Book 3 of the Spiral War Saga, Rising Warriors, Rising Threat is now with the beta readers. Once I have their input I will make any necessary changes and upon receipt of the final cover art will submit the book to Kindle Scout. From there I will have 30 days to get the requisite votes to have Amazon accept the book for publication, distribution, and most importantly, promotion. When, that happens I'll be calling on all my loyal readers to help vote.
Welcome
Welcome to the official website of Noble Storm Books and author S.F. Edwards
Showing posts with label Writing. Show all posts
Showing posts with label Writing. Show all posts
Monday, September 5, 2016
Fitness Log 5 September
Fitness Log 5-September
Sorry for the lack of updates recently. I have not fallen off the fitness wagon, I have just been crazy busy. The week of 22 August I was on travel for work and could not blog. The following week, 29 August, and the Milestone A update, I was single dading it while my wife was on travel, and was so busy getting things and kids ready for school, and having last minute summer fun, that I couldn't get to it. I still kept exercising though and the results are in the table below.
Not only did I hit Milestone A, I beat it into the ground. Weight wise I was right on track, with a slight hitch the week before, damn you free office pizza. But the waist measurement, I was an inch ahead, heck I was at, and am still at Milestone B for waist size. I am thrilled about that. Hitting Milestone B for weight might be a bit harder to achieve.
I am getting stronger everyday, adding weight to my lifts weekly if not multiple times a week, which means muscle growth. Muscle is denser than fat, so losing weight will require stepping up the Cardio something fierce. I had intended to start doing that last week, but my youngest doesn't start kindergarten until this week, meaning I have to watch him all day. My plan was to start biking for my cardio, can't bike hard with a 5 year old. Oh well.
In other weightloss/fitness news. My gym's opening is delayed until 1st quarter 2017. The reason, their landlord won't let them do their construction at the same time as the other tenant. So the current shop needs to complete their construction first. This is frustrating, but since I repaired and reinforced my workout bench shouldn't be a huge issue. They have also opened up their preview center at the mall for members to use and demo the equipment. I will be making use of that facility soon, once the wife gets back, at least two to three times a week.
In other weightloss/fitness news. My gym's opening is delayed until 1st quarter 2017. The reason, their landlord won't let them do their construction at the same time as the other tenant. So the current shop needs to complete their construction first. This is frustrating, but since I repaired and reinforced my workout bench shouldn't be a huge issue. They have also opened up their preview center at the mall for members to use and demo the equipment. I will be making use of that facility soon, once the wife gets back, at least two to three times a week.
Many people have commented that they are seeing the results of my working out, even if the scale isn't. My face and body are noticably thinner, but I am finding extra skin hanging out, and that takes a while to go away.
I am very happy with how my weight loss and overall fitness are progressing, but still have a long way to go. And because it was requested, here are the first fitness log pictures I took and the latest to compare it with.
Yes there is still a belly, but it's tighter, and not as flabby. I don't see the results as much, others do, so there;s that, and I can't argue the numbers. Let's Go.
Also I will post more reviews and writing updates soon. I am also looking at doing another design day. I just have to decide on the subject of it.
Tuesday, July 26, 2016
We're Back...
Sorry for the last of updates for the last 9 months. Life has been busy, and has kept me from working on this. But, we are back now. Here are some updates:
Spiral War, Book 3, Rising Warriors, Rising Threat, is with the editor and should be back in my hands NLT my birthday in late August. After that I will send it off to the Beta Readers, including the cover artist before finalization and hopeful release in Fall 2016. I will be posting this novel to Kindle Scout, see if I can't get Amazon to help foot the bill for advertising and promotions.
Spiral War, Book 4, The Gorvian Campaign (Working Title), is finished and now fermenting before I jump in to the self edit. I have submitted the first three chapters to the OWW however for comment as I proceed through my self edit.
I am also stepping up my own self-promotion game. I will be attending several conventions in the coming months, some I missed out on the deadline to appear, but the first will be a tiny art and hobby show at work. I won't be able to sell there, but it will get me some exposure, and I will hand out the new book cards with links to here, the amazon purchase site, and the ISBN for physical book purchase. Speaking of which, I have two boxes full of Books 0, 1, and 2, awaiting my convention appearances.
 |
| My special Owen showing off the hardcopies. |
Convention appearance one will be at the Olympic Collectible Expo's fall show on October 1, 2016 at the Silverdale Beach Hotel. I missed the last show, but am glad to appear at this one.
I am on the wait list for Jet City Comic Show on November 5-6, 2016. Crossing my fingers to get into this one. I will update on this and other upcoming appearances as they arise.
Final note for this update. I love doing reviews and am getting back into it. As part of that, I will bring out an old game I used to play with my father and other writers, 5 Scene Fixes. In that we take a movie or show that could have been great, but was hampered, and maybe ruined by 5 scenes, in some cases more. My first victim, the Star Trek reboots. That being said, I saw Star Trek Beyond over the weekend and absolutely loved it, so a longer review will be forthcoming.
Friday, April 17, 2015
The Agony of Formatting and E-Book Conversion (A Tutorial)
Zero Cost E-Book Formatting and Conversion Tutorial
So you've written your book, edited it, and have decided to go indie on the publication, casting off the shackles of the "traditional" publishing houses. But how do you ready your novel for publication without going to outside assistance? You can always go out and pay someone to take your individual files, clean them up and convert them, or buy the software to do so, which can range from $40-$160 or more. Well if you're willing to put in a little work and/or are on a tight budget, then consider this method.
I originally attempted this method as outlined on wikihow:
Convert-a-Word-Document-to-Epub
It's a good method, but somewhat incomplete and can result in some buggy output.
In my case the conversion of my book resulted in several thousand html based errors and convinced me to pay for the conversion, which I was never satisfied with. Onto the actual tutorial.
Resources:
Word Processor (MS Word, Open Office, Libre Office, etc...)
Google Docs
Calibre E-Book Manager
An Epub Validator (There are many of these out there, but this one is free and was recommended by my original distributor)
Your Novel.
Part 1: Formatting and Cleanup.
Step 1:
Using your preferred Word Processor open up your novel, be it all one file or multiple. At this point you may not have done any formatting to the story itself so it will look like the default plain text. If you have already added a chapter title, then you are already a step in the right direction.Step 2:
Highlight your main title, select "Format > Styles and Formatting" or the equivalent option for changing a "style" in your word processor, then select from the list of style options: "Heading 1" as shown here:Step 3:
Repeat this process for every chapter, this is how you will assemble your table of contents later.
Step 4:
This is the step that will take up the most of your time, so settle in for several operator hours, but first meet your new best friend, the Pilcrow ¶. Click the Pilcrow ¶ symbol (1)in your word processor and you should be immediately be presented with a view like the one below. A properly formatted document will have nothing on the page except for the actual text and Pilcrows at the end of a paragraph. Any additional spaces at the end of a paragraph (2), additional tabs (3), or carriage returns (4), should be eliminated. Take your time here, as cleaning up these little errors will have a big impact later after you convert your document, so best to do it now.
Part 2: Compiling.
Step 5:
Most word processors, MS Word in particular, have a bad habit of sneaking formatting into a document that you cannot readily see. This formatting will bite you hard when you convert to an e-book format. It was suggested by fellow author Bill Frisbee that a way to clean this up would be to first copy and paste the manuscript into google docs.
To that end, pull up google docs on your favorite web browser and paste the text from your novel into it. Note, it is important to actually cut and paste it in, do not import the document. I further recommend that this where you composite the whole document together. To do this, after you paste in a chapter, go to the bottom and insert page break.
Repeat for every chapter.
Step 6:
Now that you've compiled/assembled your novel in google docs you need to export it. There are several formats you can download it as, .docx, .odt, .rtf, .pdf, .txt, and .html. I recommend exporting for submissions into .docx as most publishers prefer this format. For e-book conversion though download it as an .rtf. Now don't be shocked to see that the rtf file will be several MB in size.
Part 3: Conversion.
Step 7:
Now open up calibre (this is free software). You will be presented with a screen like this one.
Step 8:
Click on the "Add Books" Icon in the upper right hand corner and select the rtf version of your novel.
Step 9:
Now click on the "Edit Metadata" Icon and enter in the pertinent data about your novel.
Step 10:
Click "OK" to exit back to the main screen and then "Convert books" Icon. The "Convert books" window will pop up. In the upper right corner of this screen find the "Output format" menu, select MOBI or EPUB. You can't do both at once, but you can do one then come back and do the other. I recommend EPUB first as it can be tested with ease.Step 11:
The left side menu has several items, but you'll only need "Look and Feel" and "Table of Contents."Step 12:
Under "Look and Feel" check the "Remove spacing between paragraphs" box.
Step 13:
Under "Table of Contents" select the wizard button to the right of "Level 1 TOC (XPath expression). This is where your formatting comes in handy.
Step 14:
From the drop down menu labeled "Match HTML tags with tag name:" in the new window that pops up select "h1" and click "OK."Step 15:
You should now see "//h:h1" listed in the Level 1 TOC field.Step 16:
Click "OK" and Calibre will begin converting. Conversion can take a few minutes, so be patient. If you converted to MOBI the first time, then hit the "Convert books" button again and select EPUB to convert to that format. Then you'll want to hit the big "Save to disk" button.What you're saving is actually a directory (author's name) with a set of files (all their works.) Because off this, you'll want to save all your Calibre conversions into a super-directory called "authors" or some such. If you enlarge the picture above you'll see the location is:
Documents > My Documents > My eBooks > Authors
This is where you want to be, with the "Folder" field at the bottom of the windowblank when you press the "Select Directory" button. What happens is that Calibre will search this directory for the author's name and either save to that author's directory if it's already been created, or create it if it's not yet there.
Part 4: Testing.
Step 17:
Now navigate over to your epub validator and upload your newly created epub.
If you've done everything right then the system will return zero errors. Most errors will appear as html errors though.
Yes, I cribbed most of this tutorial from the wikihow article, but there are some changes and additional steps that had I known them at the time would have saved me quite a bit of time, money and embarrassment.
Friday, April 3, 2015
The Spiral War Technical Database is now open.
Sorry we've been quiet lately, but I've been working on editing In Death's Shadow along with updating and uploading the files for the technical database. I will update this as I write up new documents and as I update the science within the database.Enjoy.
Saturday, March 7, 2015
Design Day
So I have not been able to keep up a daily blog posting schedule, not yet anyway. I am therefore going to shoot for at least a weekly if not a bi-weekly update schedule.
For today I'm going to talk design. Maybe it's because I'm an engineer by training but bad and/or inconsistent designs have always bugged me. I will not say that my own designs are perfect but I have always tried to keep my designs consistent and believable.
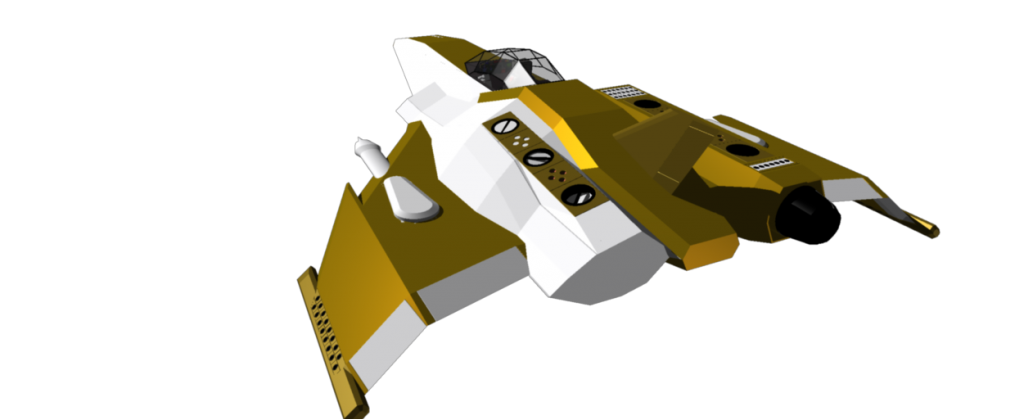
For this design day post I'm going to go over the progression in design of one of my own craft. The Splicer-1000 "Dagger" fighter/trainer that plays such a critical role in Spiral War: On Dagger's Wings.
 My original inspiration for the Splicer 1000 was a cross between the venerable X-Wing fighter from Star Wars and the proposed delta wing X-15 rocket plane. I wondered what it would would look like flipped over and with a delta wing instead of its trademark split wings.
I originally designed many of my craft using paper and pencil, and unfortunately most of those drawings are now gone. If I can find them, which is doubtful, I will scan and attach the image.
I then transitioned to CAD back in the mid-90s and redrew the designs in TurboCAD. While I still have most of those files, I cannot access them anymore, the version I used back then is too outdated for any program I have to read the old 2-D drawings.
Then in the late 90s I started using AUTOCAD. While I have again lost most of those early images I do have some of early redesigns.
Splicer 1000, Circa 1998.
The overall design was locked in earlier than this, a delta winged single seat light fighter with a mid-fuselage mounted cockpit, with twin engines, fuselage mounted weapons (story concession) and wing mounted missiles (in the pods). It also features obvious thermal radiator wrapped around the engines and sensors in the wingtips.
The texture maps here were cribbed straight from the old X-Wing alliance game. I had no skill with them at the time, and it shows.
Splicer 1000, Circa 2001
The overall design here is not much changed, but I attempted to add details and some realism via textures and subtle additions. The craft now features maneuvering thrusters in the nose and wingtips, along with runners of the cockpit to open and an actual cockpit interior. The reverse thrusters are still pretty rudimentary but I added some basic maintenance hatches, the landing gear bays, and moving control surfaces for atmospheric flight.
Splicer 1000, Circa 2003
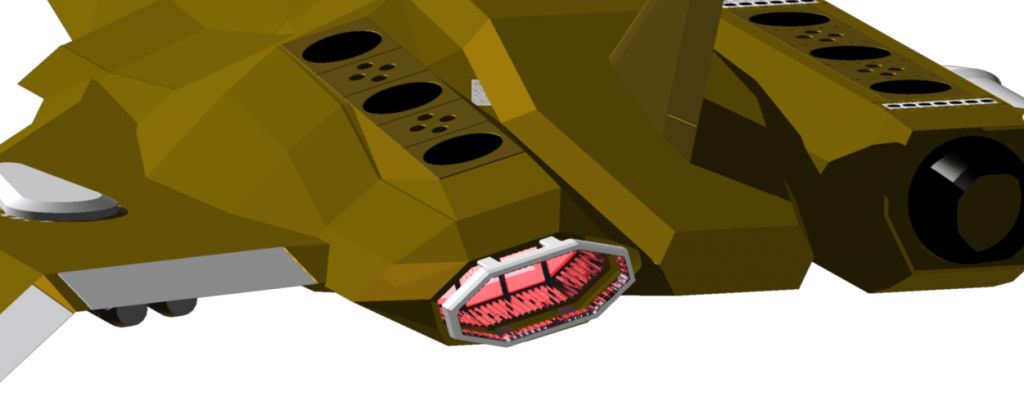
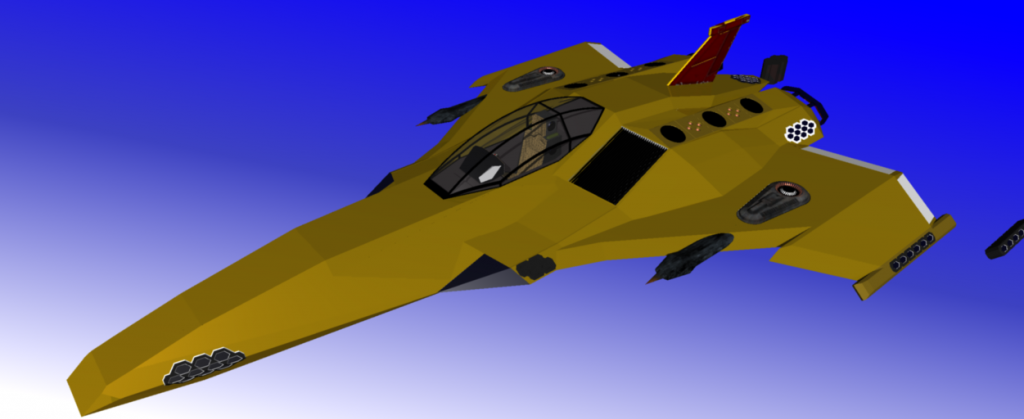
In 2005 I upgraded my autocad package and with it began a serious redesign effort of all my craft. For the Splicer 1000, I wanted to start from the ground up and threw out the whole design, but endeavored to keep the major salient features, final result seen above. I kept the delta winged design, but made it more of a cranked arrow similar to the F-16XL. I also gave the outer section an anhedral, dropping it down. The inakes of the earlier design are gone, replaced with simple reverse thrusters. And I added a ton more maneuvering thrusters, this are space fighters and with damage expected I wanted plenty of redundancy. I also redesigned and moved around the weapons, keeping the plasma laser cannons on the belly, and added new external missile hardpoints.
But it didn't start out that way.
Around this time is when I first really started documenting my design work. This is how the design started, a grey blocky mess.
In short order I gave it a quick yellow color scheme to match with the standard cadet colors I described in the novel, added weapons, chamfered the wings to give them a more realistic shape and replaced the ovoid cockpit with something more angular and framed in looking.
In short order I darkened the color and shifted around the weapons, burying the larger cannons in the wings and I added the docking claw hardpoints to the engines. These were something I always toyed with. The fighters could launch or "land" on their motherships via arms that would extend and hold them in place. Power could be recharged, fuel tanks filled, as well as life support systems. I also cut in the reverse thrusters.
Next came the first version of the thruster emplacements and the moving of the Plaser cannons to a better location, that also fit the book narrative better. There is also a vertical stabilizer there and the early wingtip sensor pods, upon which more thrusters are emplaced.
The landing gear came in next, which necessitated redesigning some of the thrusters and their placement. Even is science fiction design compromises take place, at least if you want to maintain a sense of realism.
 |
| Inert Training Missile: Tactical Round Simulator (TRS) |
Speaking of realism, these missile simulators for the trainer version are actually based on the CRS/PRS RAM simulators I helped to design during my time working at NAVSEA PHD.
 |
| Electron Particle Cannons (EPCs) |
 |
| Plasma Laser (Plaser) cannons. |
While on the subject of weapons, check out these close ups on the guns. Notice all the thermal radiators built into each one. Weapons in space will get hot, and they need expel that thermal energy away somehow.
At this point, the design has pretty much come together, complete with cockpit. Now comes the DETAILS.
This shot does a good job of showing all the panel lines I cut in to make the craft look more user and maintainer friendly.
Finally come the textures. These really help the design come to life, showing wear and tear and dirt marks show that a craft is used and real. Now, notice how there are no giant thermal radiators in this design? For this generation of designs I changed my text base, the wings help serve at the thermal radiators as do the thrusters themselves when not in use, and internal heat sinks.
Beauty Shots.
Splicer 1000 Circa 2011-Current
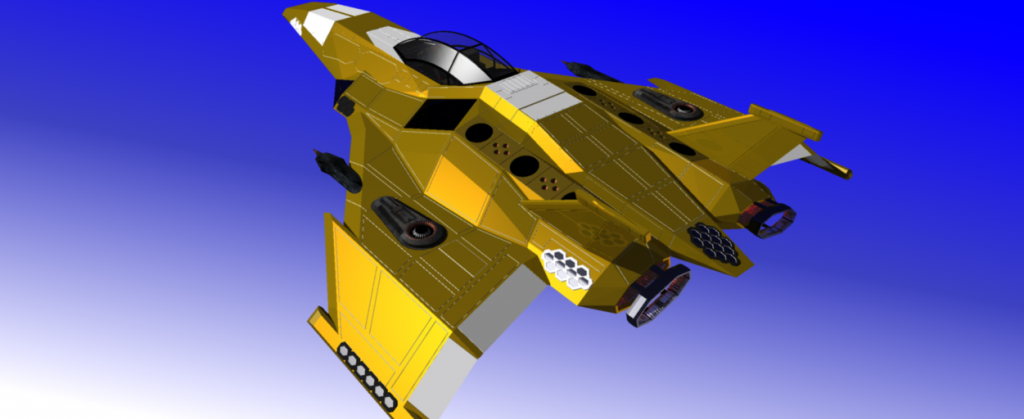
Round about 2011 I decided to redesign my craft once again. I had just completed re/modelling some of my enemy craft and now the hero craft didn't meet the same standards. Also, the means by which I textured the craft had changed too, and the old method made it a serious pain to change color schemes. As these things do, the redesign started small. I like most of the old model, so I wanted to preserve it as much as possible, but change the parts that bugged me most.
I started by stripping away the old engines, but kept the parts on them that were most important, in this case the docking points.
From there I cut in a new, blended fuselage and engines.
A whole lot of cutting and chamfering later and I added the docking points back in, though they are angled this time.
This highlights one of them major design changes, the engine size and shape. I went with a more octagonal exhaust this time with more details inside the engine itself. See the old jet engine style exhaust on the old engine to the right.
With the main engines redesigned also adopted this clamshell design for the reverse engines. This cleans up the profile of the ship for atmospheric flight and still allows a measure of thrust vectoring of the plasma exhaust.
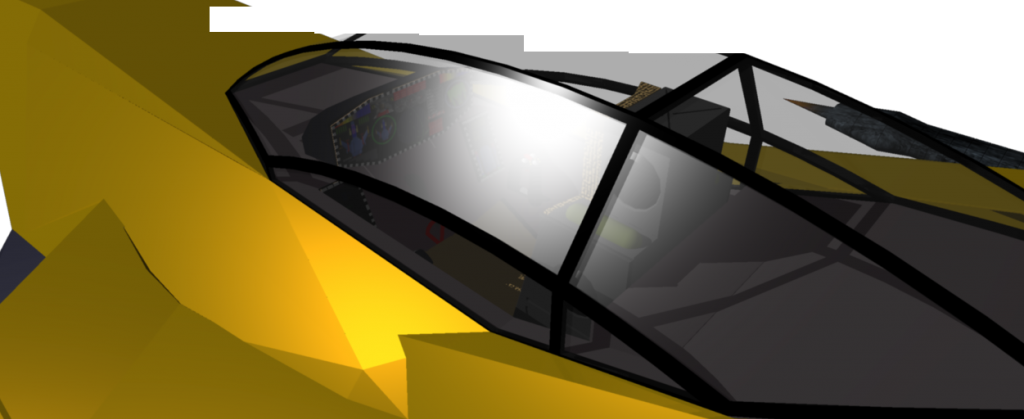
A nice closeup of the cockpit, notice the minimal railing this time around, though I still need to redo that HDD console.
As part of the redesign I really considered the world I'd created. The confederation has been space faring over a millennium. In that time they would have something more advanced than simple gas thrusters like I modeled before. So I sat down and did my research into proposed future propulsion systems, especially ones I could have double as thermal radiators. The result is the hexagonal magnetic accelerator panels seen above that accelerate miniscule particles up to extreme speeds to kick the fighter around. The downside, they burn out quick and require regular replacement. Little details like this add a lot of realism to a story,
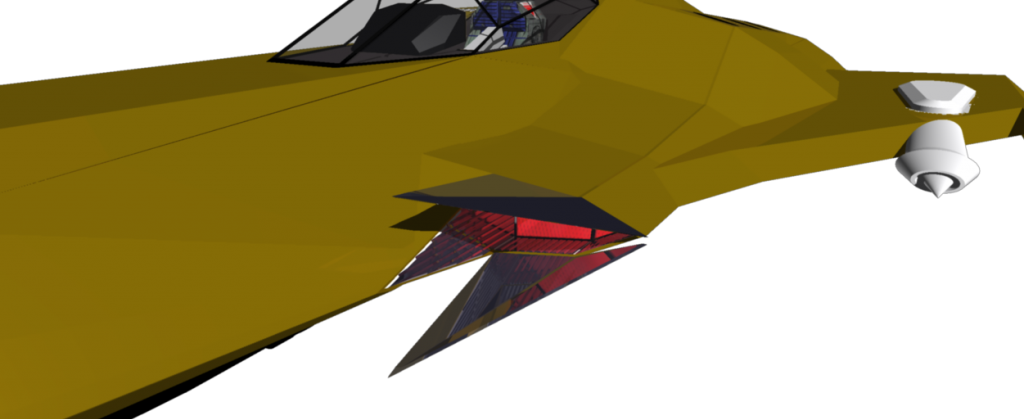
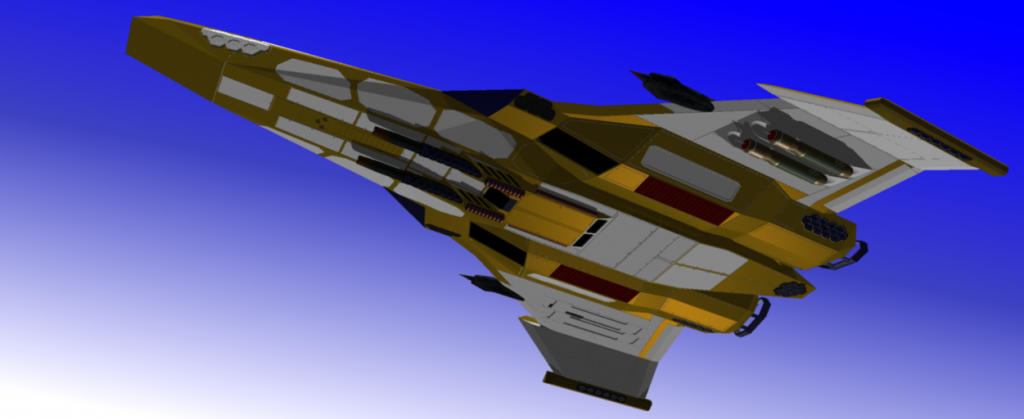
At this point, the single vertical stab just looked out of replaced with twin stabs. Also, chekc the mirror image beneath. That red panel is landing gear that I preserved from the earlier version. But that grey panel next to it, that slides away to reveal an internal missile bay. This is also a good time to point out the grills on the front of main engine. Those serve two purposes: #1 they are hydrogen ram scoops allowing the fighter to self refuel while on patrol or if it comes to a nice hydrogen gas giant. #2 they act as thermal radiators, venting away excess heat.
Tt's all in the details. For the most part, the grey bits in these shots are parts that carried over from the last version or we only minimally modified to onto the new design. Next step texturing.
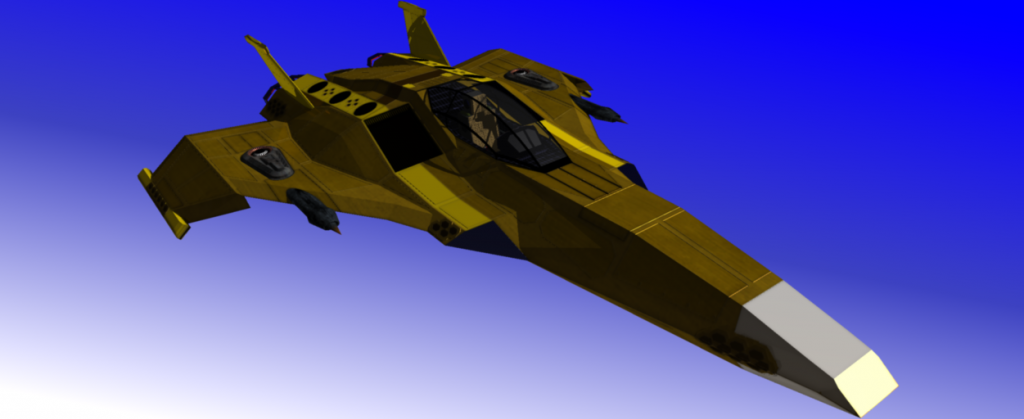 |
| Standard Cadet Scheme |
 |
| Fleet, Light Fighter |
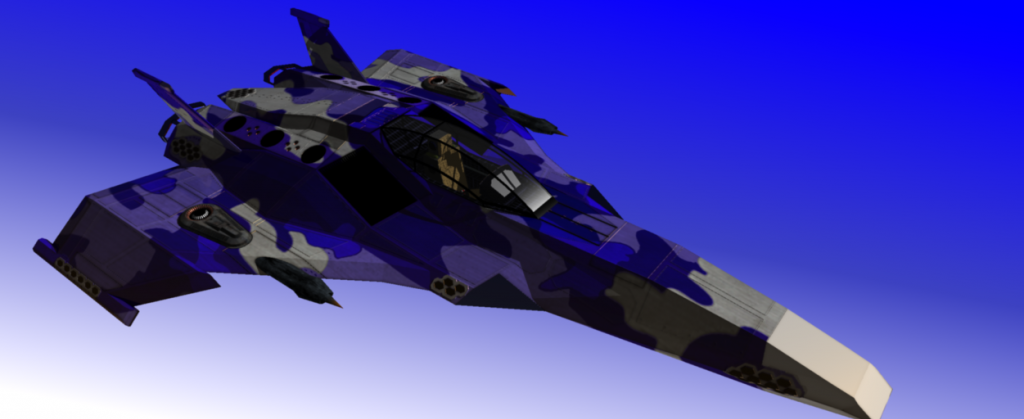 |
| Sukhoi Flanker Inspired Scheme |
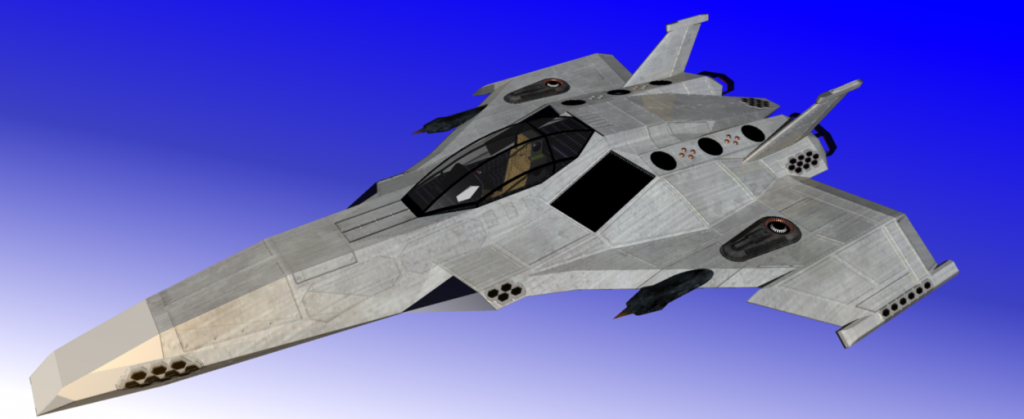 |
| Factory Fresh |
These images serve to illustrate how much easier the new texturing method is and how it has allowed me to create various schemes with much greater ease as seen with the trio of fighters that grace the cover of Spiral War: On Dagger's Wings.
 |
| Cover Fighters |
Subscribe to:
Posts (Atom)


.png)


